Sunday, February 22, 2015

Valentine's Day in the Middle

Middle school students are too cool for Valentine's Day cards. Just because they are too cool to hand them out, doesn't mean they don't want to receive them! I love being able to surprise my students with something that makes them feel noticed and cared for. Being acknowledged is a major part of the psyche of a middle schooler, at least in my experience. So while looking for Valentine's ideas for the sprout I came across an idea perfect for an English classroom.

Here's what I pinned:


I followed the link in the pin to Etsy to purchase and download the PDF template for the tops of the baggies.


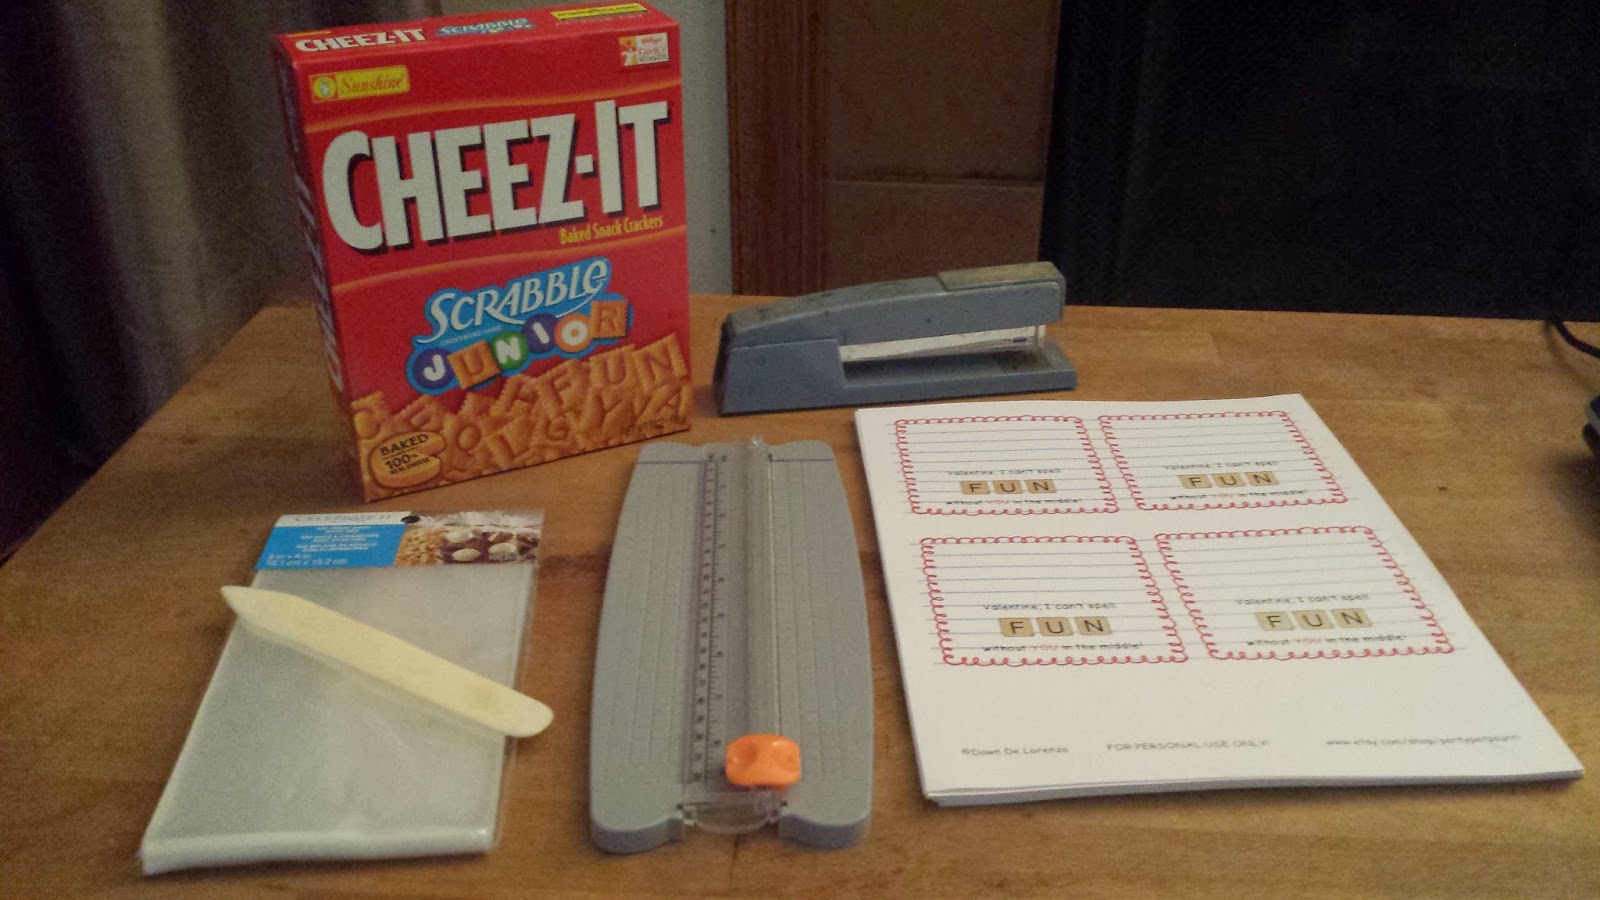
Here's all of the supplies I used in order to create the valentines:

I started out by cutting out all of the little cards and trimming them to the correct size. It's really important to have sharp scissors or a scrapbooking trimmer so that this part goes smoothly. I ended up cutting out a LOT of them as you will see, so the sharper your blade, the easier this part will be.


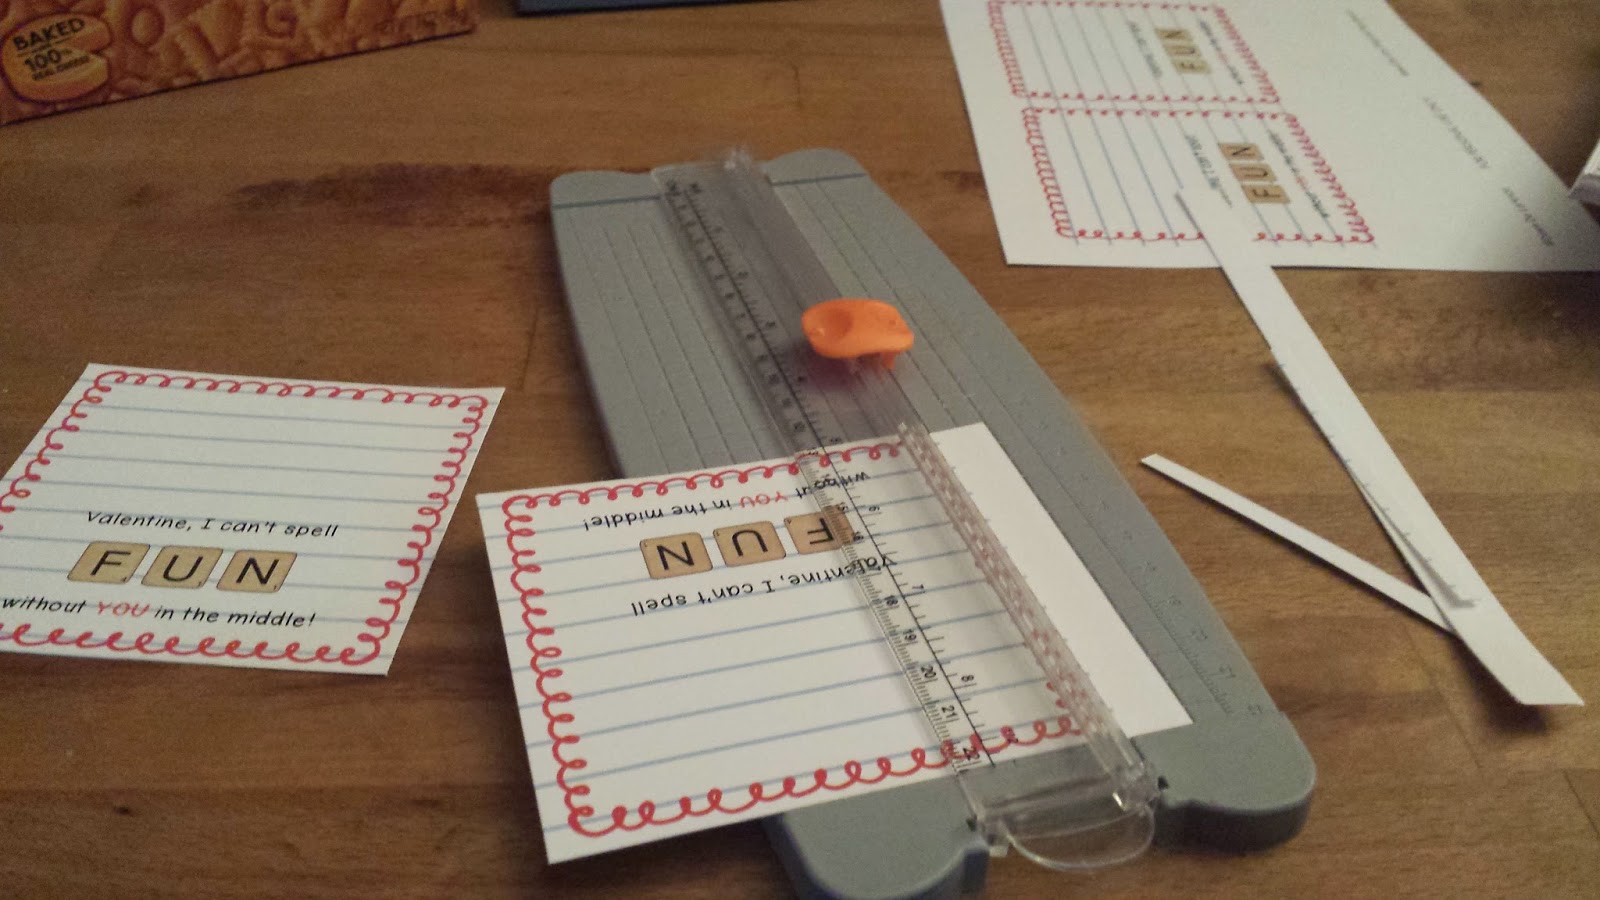
Next, I had to fold all of the little cards. For this step I used the bone folder. Yeah, you could just use your hand to fold it, but the bone folder makes the crease so sharp and makes really fast work of your project. It also helps keep your project clean and free from hand oils. Here's a video I made (with my knees!) that shows how to use a bone folder.


The next step is to fill the bags with the Cheez-its, then fold over an inch and a half or so at the top of the bag. I chose to fill the bags with 10 Cheez-its each. I needed to make sure that I had enough for my whole project and I didn't want to to over fill the bags either.


Finally, I took one of the cards that I pre-folded and placed it over the fold I made at the top of the bag. I then used my stapler to put one staple on each side of the card, to secure it to the top of the bag.


I think they came out pretty cool! I ended up making 160 of them! I would definitely do this project again. It was an easy way to do something a little extra, wasn't too expensive (I think I spent about $30 because I already had the bone folder,stapler, trimmer, cardstock, and a few of the bags, left over from another project. So they came out to a bit less than 19 cents each). Make stuff for big kids, too! everyone likes getting a Valentine!


Tuesday, February 17, 2015

Cream Cheese Frosting

So just as I said in an earlier post, I'm trying to eat more healthfully. And now I bring you...
Cream Cheese Cupcake Frosting.          

You're welcome.

Here's what I pinned:


I scoured through several different cream cheese frosting recipes before settling on this one. Ultimately, I ended up choosing this one because it seemed the most simple, with the fewest ingredients and one that was lower in sugar than the others. I personally like tasting the cream cheesy-ness of this recipe and others had twice as much sugar or worse! I was not looking to cut calories, because let's face it: it's cream cheese frosting. However, I do look to cut out a gram or two of sugar where I can. 

The original blogger used reduced fat cream cheese, but I say that if you're going in, might as well go in all the way! Besides, low-fat foods seem to have more additives, sugar, and salt than their full fat counterparts, because the manufacturer is trying to make it taste better. You know what makes it taste better? FAT! So get the full fat version. You won't be disappointed, and if you're watching calories, don't eat a cupcake.


Another deviation I took from her recipe was that I used unsalted butter instead of the salted stuff. I also opted for grass-fed Kerrygold Irish butter. I love this stuff! Both the salted and unsalted versions are delicious. If there is a grass-fed option for anything, it's usually worth the extra cents to get. Not only does it taste better, but it's closer to what nature intended.

Here's the cream cheese, vanilla, and butter waiting to be blended into delicious frosting goodness. After whipping together these three ingredients, you are supposed to use sifted powdered sugar. Well, I don't sift much, so I just gradually shook about half of the box of powdered sugar into the frosting while mixing it with my electric mixer (I also don't measure much). Someday a KitchenAid will be mine!


In the end, I was able to frost all 30 of my cupcakes (with a bit to spare!). It was delicious! I have seen other variations on basic cream cheese frosting that come out to be chocolate, strawberry, or spiced flavor. Those are definitely ones I want to try after making this batch. I have begrudgingly purchased canned frosting for way too long, knowing that they were full of chemicals and partially hydrogenated death. Hopefully those days are soon over. Buttercream is next on my list of frosting to tackle. It was so easy! Pinterest for the win!

Friday, February 13, 2015

Valentine's Day for the Sprout

So just like any self-respecting Pinteresting mommy, I made Valentines for my son, AKA Sprout, to take to daycare. Being that Sprout's only one and a half, I kind of saw this as a low-risk trial run for later Valentine's undertakings. And it's fun. Who am I kidding?

So this is what I pinned:


So I got started by printing out the little circles on regular printer paper. The blogger who created these has a super nifty machine called a Silhouette that cuts stuff out perfectly, and well... I don't. So, scissors!

Cut, cut, cut!
After I was all done cutting them out, I needed to make them stronger somehow. The printer paper alone wasn't going to hold up, and besides, they needed a bit of jazzing up!

I wanted to do something a little more masculine than the pink scalloped border on my pin, so I searched around the craft stash and found some turquoise card stock. I used a glue stick and glued all of the circles down, then just cut around them again, this time leaving a quarter inch border all the way around. Meanwhile, I also print and cut out my tag for the hand soap gift for his daycare provider and glued and trimmed that as well.


The tags came out pretty cute. Some might say they look a little sloppy, but I'd say they have that "handmade" touch with the uneven borders.


Next, it was time to trace my little one's hand. Anyone who's ever asked a toddler to hold still for anything knows how big of an accomplishment the tracing job I did is. I amazed myself! He moved at one point and I had to replace his hand over the part we already traced to finish the job. Because I just barely accomplished this is, I cut it out and traced three more, just in case I want to use them for anything.  He ended up ripping one of them, but I still have two more left!


When I got to work, I had one of my teacher's assistants help me string the tags onto the soap and applesauce pouches. Mission accomplished! Happy Valentine's Day!


Wednesday, February 4, 2015

Paleo Chicken Tortilla-less Soup

Ever since I began to lose weight a couple of years ago, I have been working on changing my diet to include more whole foods and less processed junk. It's tough... mostly because hamburgers and fries, but that's a story for another post.

I pinned Paleo Chicken Tortilla-less Soup. I remember one of the first things I cooked for Orlando was Tortilla Soup. He gave me his highest compliment by saying, "My mom would love this!" Oh - still be my heart! So now in an effort to live longer, here we are. No vegetable oil and certainly no tortillas! Not to say that those don't occasionally slip into my diet, but compared to how I was eating four years ago, it's much better.

I was excited to find this pin, mostly because the picture looked delicious and I was totally hungry, but I wanted to recreate a bit of that tortilla soup magic for the fam!


I happily headed to my favorite grocery store, Sprouts, and picked up all of my ingredients. Chicken breast was on sale for $1.99! Score!

So I got these chicken breasts home and they were huge! I needed them to cook quickly, because... well... I was hungry! So I gave them a couple of quick slices and that was that! I topped them with a bit of melted ghee and sprinkled on a mix of "taco seasoning" that I mixed together based on personal preference.

Here's what I came up with:

(measurements approximate...)

1 tbsp ground cumin
1 tbsp chili powder
2 tsp garlic powder
2 tsp onion powder
1/2 tsp cayenne pepper

Just adjust the seasoning to your liking then sprinkle it all over that chicken. There was some leftover so I just tossed it in the soup at the end. I like it spicy.

After this short departure from the recipe, I pretty much followed the directions on the blog. Cut up your onions, saute them down, then put in the peppers and garlic. Saute that up a bit, then add the roasted tomatoes and chicken stock (this is when I put the extra seasoning in). I even blended some of the soup up before putting the chicken in, like the blogger suggested. A little salt to taste at the end is a must. It came out great! It tastes best with a bunch of avocado, cilantro, and lime at the end. Tapatio is a great addition, if you like it extra spicy like me! Even my little guy approved! A Pinterest success!